Introduction
ReactifyAI is a modern, clean, and performance-optimized React template designed for AI startups, technology businesses, and machine learning service providers.
It's built with React 19, TypeScript, Vite, and Tailwind CSS 4, offering a highly modular component system, futuristic interface design, and lightning-fast performance.
Whether you're launching an AI SaaS product, a tech service platform, or a data-driven business website, ReactifyAI provides everything you need to present your brand professionally, including dedicated pricing and utility pages.
Features
- Built with React 19, TypeScript, and Vite
- Powered by Tailwind CSS 4.0
- Modular and reusable component architecture
- Light/Dark mode supported
- EmailJS integration for working contact form
- Fully responsive design
- Optimized assets and clean folder structure
- Modern animations using AOS
- Dedicated pricing flow with hero section, billing toggle, pricing cards, comparison table, FAQ, and CTA
- Branded not found experience with search-assisted recovery actions
- Launch countdown screen with email capture and social links
- Well-commented code and developer-friendly setup
- Fast build process with JavaScript Obfuscator for code protection
Folder Structure
reactifyai-template/
├── eslint.config.js
├── index.html
├── package.json
├── .env
├── public/
│   ├── images/
│   │   ├── favicon.png
│   │   ├── favicon.svg
│   │   ├── logo.svg
│   │   └── placeholder/
│   │       ├── blogs/
│   │       ├── others/
│   │       ├── projects/
│   │       └── teams/
│   ├── robots.txt
│   └── _redirects
├── README.md
├── src/
│   ├── App.tsx
│   ├── components/
│   ├── pages/
│   ├── routes/
│   ├── styles/
│   ├── utils/
│   └── vite-env.d.ts
├── tsconfig.json
└── vite.config.ts
Installation & Setup
Requirements
- Node.js version 18 or higher
- npm, yarn, or pnpm package manager
Installation Steps
- Unzip the downloaded file.
- Open the folder reactifyai-template in VS Code or any code editor.
-
Run the following command to install dependencies:
npm install
-
Start the development server:
npm start
-
Open your browser and visit:
http://localhost:3000
Development Commands
| Command | Description |
|---|---|
| npm start | Run the project locally in development mode |
| npm run build | Create a production build (includes JS obfuscation) |
| npm run preview | Preview the production build locally |
| npm run lint | Run ESLint check |
| npm run pretty | Format code using Prettier |
Environment Variables
Update the following values in .env
# EmailJS Config
VITE_EMAILJS_SERVICE_ID=YOUR_EMAILJS_SERVICE_ID
VITE_EMAILJS_TEMPLATE_ID=YOUR_EMAILJS_TEMPLATE_ID
VITE_EMAILJS_PUBLIC_KEY=YOUR_EMAILJS_PUBLIC_KEY
VITE_FROM_NAME=YOUR_FROM_NAME

# Team Images
VITE_TEAM1_IMAGE=/images/placeholder/teams/team1.png
VITE_TEAM2_IMAGE=/images/placeholder/teams/team2.png
VITE_TEAM3_IMAGE=/images/placeholder/teams/team3.png
VITE_TEAM4_IMAGE=/images/placeholder/teams/team4.png

# Blog Images
VITE_BLOG1_IMAGE=/images/placeholder/blogs/blog1.png
VITE_BLOG2_IMAGE=/images/placeholder/blogs/blog2.png
VITE_BLOG3_IMAGE=/images/placeholder/blogs/blog3.png
VITE_BLOG4_IMAGE=/images/placeholder/blogs/blog4.png
VITE_BLOG5_IMAGE=/images/placeholder/blogs/blog5.png
VITE_BLOG6_IMAGE=/images/placeholder/blogs/blog6.png

# Project Images
VITE_PROJECT1_IMAGE=/images/placeholder/projects/project1.png
VITE_PROJECT2_IMAGE=/images/placeholder/projects/project2.png
VITE_PROJECT3_IMAGE=/images/placeholder/projects/project3.png
VITE_PROJECT4_IMAGE=/images/placeholder/projects/project4.png
VITE_PROJECT5_IMAGE=/images/placeholder/projects/project5.png
VITE_PROJECT6_IMAGE=/images/placeholder/projects/project6.png

# Other Images
VITE_HERO_IMAGE=/images/placeholder/others/hero.png
VITE_ABOUT_IMAGE=/images/placeholder/others/aboutimage.png
Color & Theme Customization
You can customize all color variables in the file: src/styles/index.css
Example:
:root {
	--color-primary: #8d3bd4;
	--color-accent: #ec4899;
	--color-background: #faf4ff;
	--color-text: #000000;
	...
}
For dark mode, modify values inside the .dark class section.
Quick Customization Tips
Edit images/logo.svg or replace SVG content
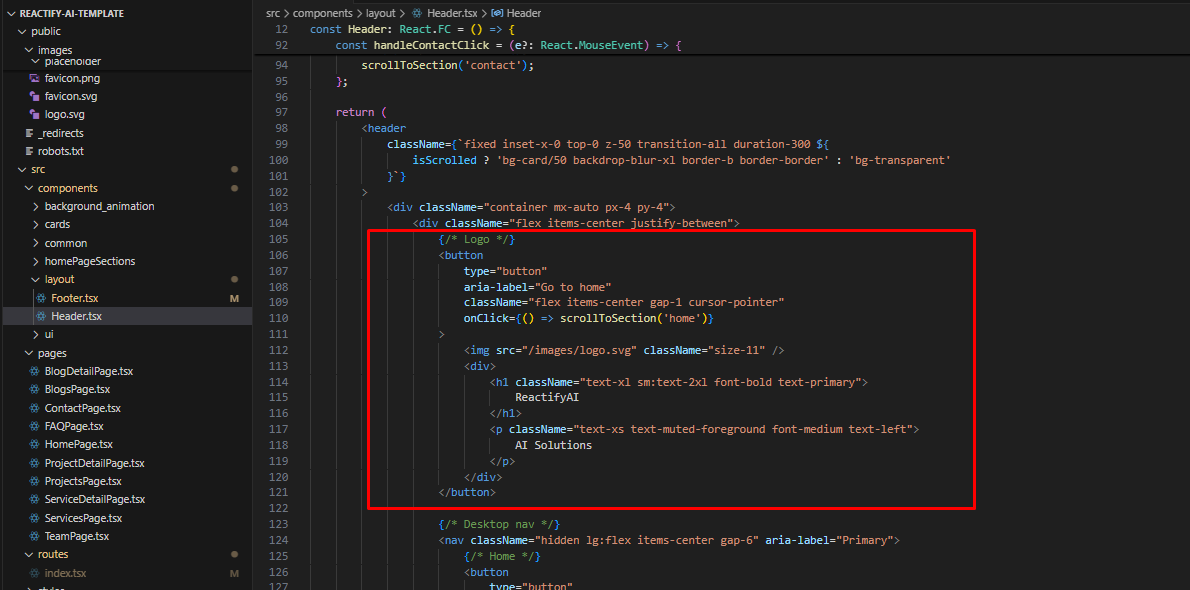
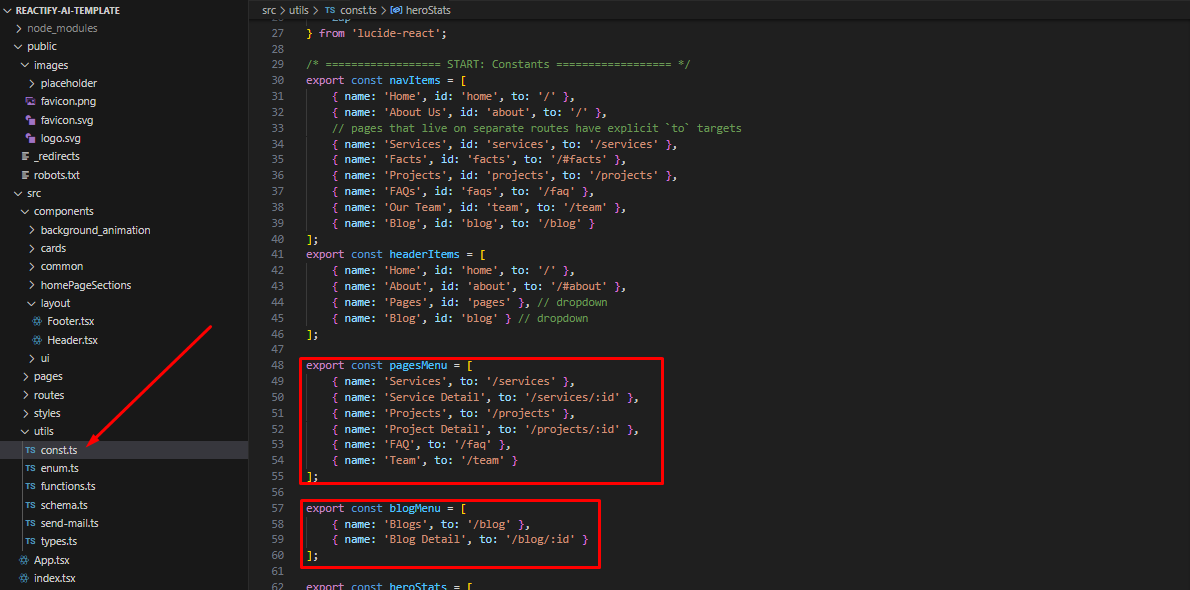
Edit src/utils/const.ts
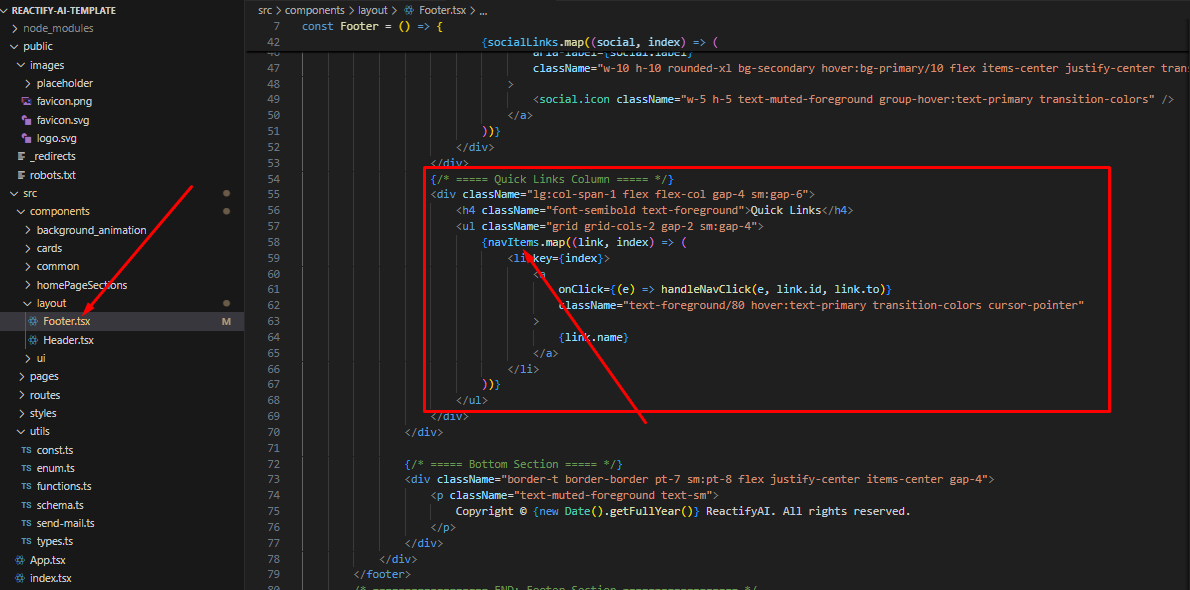
Modify src/components/layout/Footer.tsx
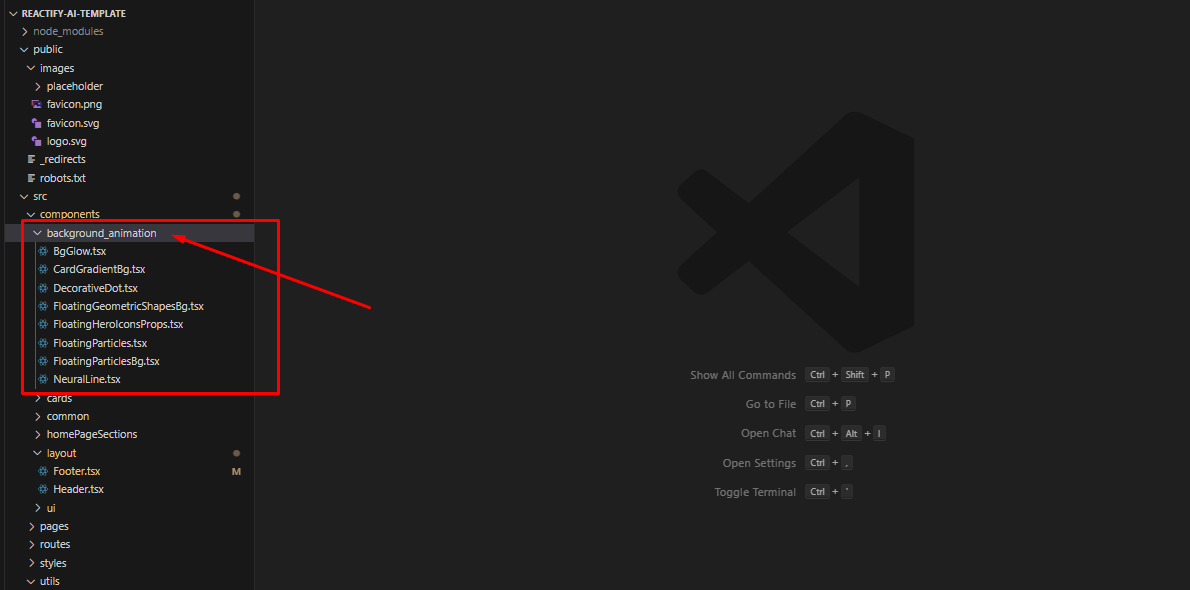
Update src/components/background_animation/
Configure /src/routes/index.tsx
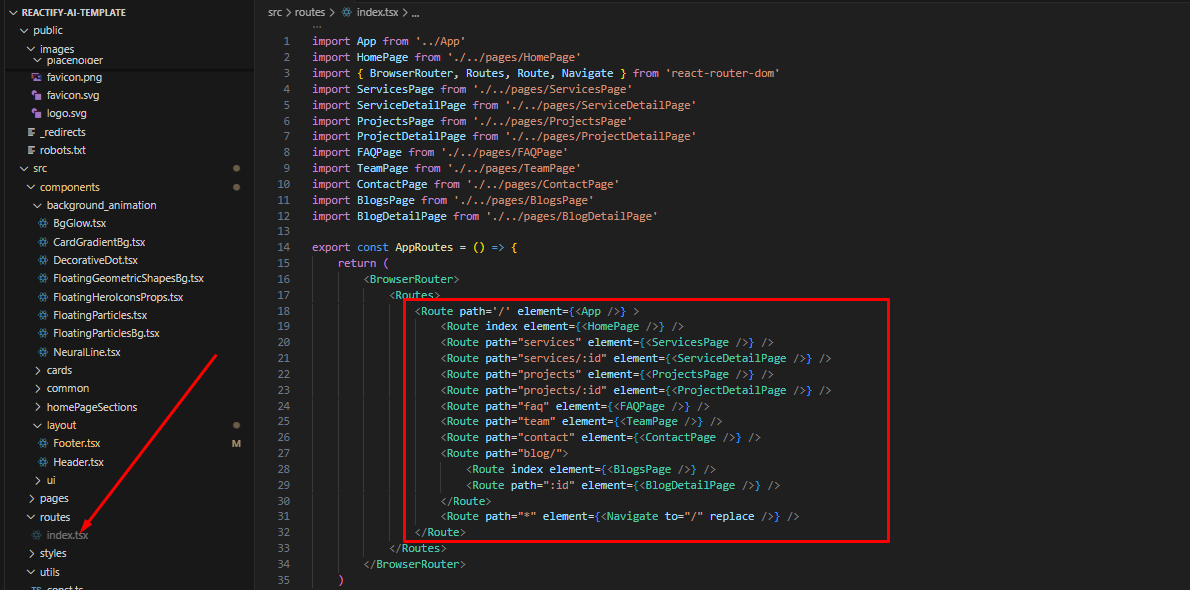
Adding New Pages
- Create a new file inside /src/pages/
-
Add the route entry in
/src/routes/index.tsx
<Route path="/new-page" element={<NewPage />} />
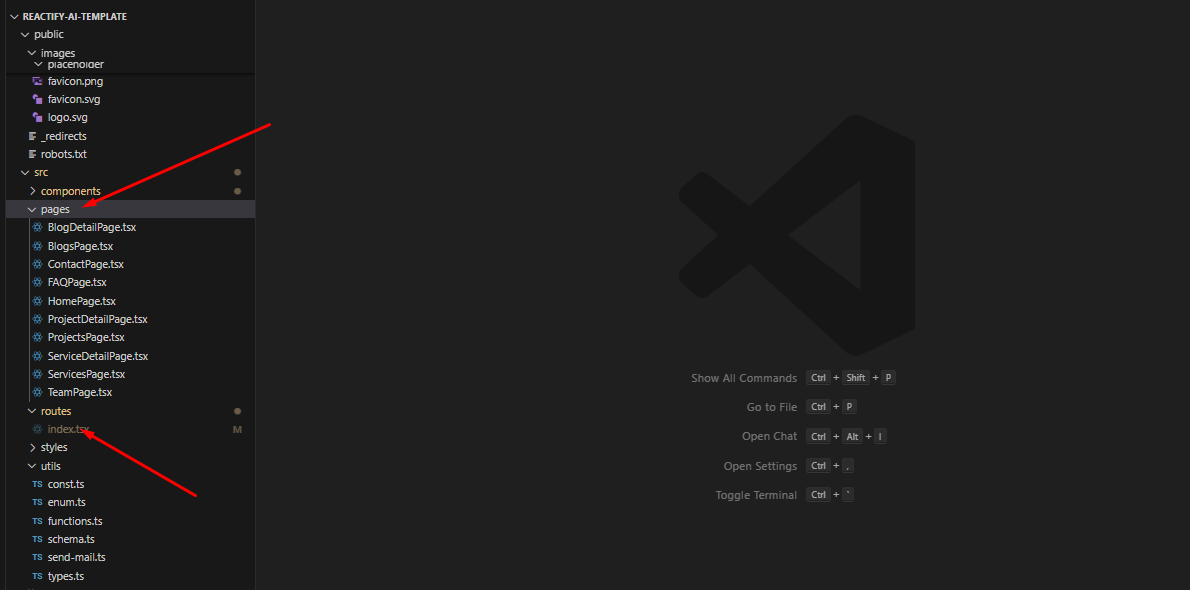
Included Pages
| Page | File | Description |
|---|---|---|
| Home | HomePage.tsx | Main landing page with homepage sections |
| Pricing | PricingPage.tsx | Pricing hero, plans, comparison table, FAQ, and CTA |
| Coming Soon | ComingSoonPage.tsx | Launch countdown and email subscribe screen |
| 404 / Not Found | NotFoundPage.tsx | Catch-all route with recovery actions and search |
| Contact | ContactPage.tsx | Contact us page |
| Services | ServicesPage.tsx | Service listings |
| Service Details | ServiceDetailPage.tsx | Individual service information and pricing |
| Projects | ProjectsPage.tsx | Project portfolio showcase |
| Project Details | ProjectDetailPage.tsx | Individual project case study |
| FAQ | FAQPage.tsx | Frequently asked questions |
| Team | TeamPage.tsx | Team members showcase |
| Blogs | BlogsPage.tsx | Blog listing page |
| Blog Details | BlogDetailPage.tsx | Single blog post view |
Current Routes
| Route | Page |
|---|---|
| / | Home |
| /pricing | Pricing |
| /coming-soon | Coming Soon |
| /services | Services |
| /services/:id | Service Detail |
| /projects | Projects |
| /projects/:id | Project Detail |
| /faq | FAQ |
| /team | Team |
| /contact | Contact |
| /blog | Blogs |
| /blog/:id | Blog Detail |
| /404 | Not Found |
| * | Not Found |
- src/components/sections/PricingSection.tsx - Pricing hero, billing toggle, and plan cards
- src/components/sections/PricingComparisonSection.tsx - Plan comparison table section
- src/components/sections/NotFoundSection.tsx - Branded 404 recovery section
- src/components/sections/ComingSoonPage.tsx - Countdown and subscribe landing section
Build for Production
To create a production build, run:
- The build files will be generated inside the /dist folder.
- Code is automatically obfuscated using javascript-obfuscator.
- You can deploy the contents of /dist to any static hosting (Vercel, Netlify, AWS S3, etc.).
To preview the production build locally:
Just ensure your _redirects file is included to handle React Router routes properly.
Main Dependencies
| Library | Description |
|---|---|
| React 19 | Latest UI Framework |
| TypeScript 5.8 | Type-safe JavaScript |
| Vite | Fast build tool & dev server |
| Tailwind CSS 4.1 | Utility-first CSS framework |
| React Router DOM 7.7 | Client-side routing |
| EmailJS Browser SDK | Contact form integration |
| AOS Animation Library | Scroll animations |
| React Hook Form + Yup | Form handling & validation |
| Lucide React | Beautiful icon library |
| React Toastify | Toast notifications |
For complete dependency list, refer to package.json.
Credits & Sources
| Resource | Description | License |
|---|---|---|
| Vite | Build Tool | MIT |
| Tailwind CSS | CSS Framework | MIT |
| AOS Animation | Animation Library | MIT |
| Lucide Icons | Icon Library | ISC |
| EmailJS | Email Service | Free Tier Available |
| Google Fonts | Geist | Open Font License |
| Unsplash | Demo Images | Free License |
Image & Font Policy
✅ Preview Usage
- All images used in the preview are from free stock sources and for demo purposes only.
- Replace them with your own licensed or copyright-free images.
📁 Image Sources
- Unsplash - Free high-quality images
🔤 Fonts Used
- Geist (Google Fonts)
Support Information
Within 24–48 hours (business days)
Use the official Support tab under your purchased item
✅ Support Includes:
- Availability of the author to answer questions
- Answering technical questions about item's features
- Assistance with reported bugs and issues
- Help with included 3rd party assets
❌ Support Doesn't Include:
- Customization services or new feature requests
- Installation services
- Third-party plugin or API integration
- Review this documentation for setup and configuration steps.
- If the issue persists, contact us via the Support tab.
- Provide screenshots, browser info, or console logs to help us resolve issues faster.
Change Log
- Added PricingPage with billing toggle, pricing cards, comparison table, FAQ, and CTA
- Added NotFoundPage and catch-all route handling for unknown URLs
- Added ComingSoonPage with countdown timer, social links, and email subscribe UI
- Updated shared route constants and dropdown navigation entries for the new pages
- Improve Lighthouse page speed scores by optimizing assets and code splitting
- First release with 10+ pages
- Added light/dark theme support
- Integrated EmailJS for contact forms
- Included modern animation components with AOS
- Built with React 19, TypeScript, and Tailwind CSS 4